Wondering how to make a Kydex holster? Creating a custom Kydex holster at home is not only a practical project for gun enthusiasts but also a cost-effective alternative to commercial options. This DIY guide walks through each step of the process using easily accessible tools and materials, offering precision and personalization in every fold.
If you’re still comparing DIY vs. store-bought, take a look at our roundup of the best CCW holsters before you decide.
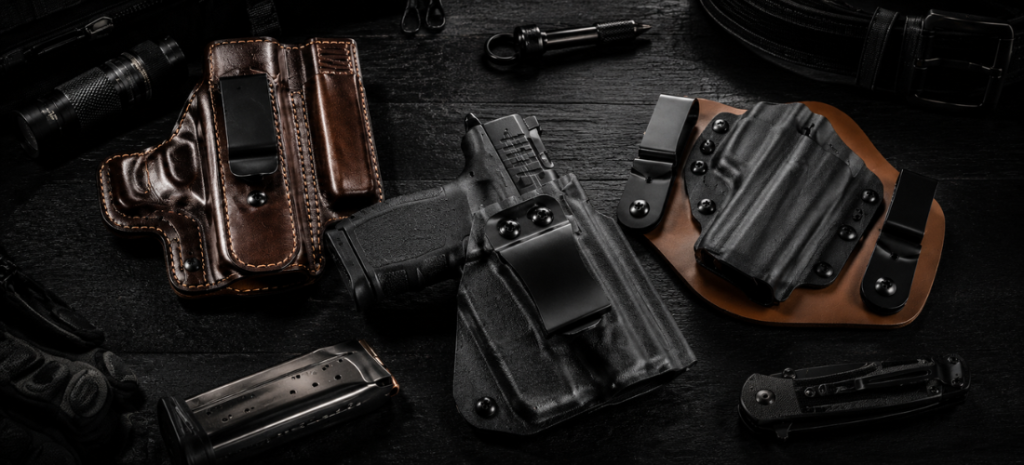
Tools and Materials Required
Essential Tools:
- Utility knife or scoring tool
- Heat gun or toaster oven
- Drill with assorted bits
- Pencil or marker
- Dremel with sanding drum (optional)
Recommended Materials:
- Kydex sheet (thermoplastic plastic)
- Foam molding press or MDF boards
- Chicago screws and eyelets
- Rubber spacer or fuel hose
- Sandpaper (150 to 600 grit)
Step 1: Cut and Prepare the Kydex
Set the gun on a safe surface first — this quick compare of gun mats vs. cloth shows why it matters. Start by laying your unloaded pistol flat on a fresh Kydex sheet. Use a pencil to outline the entire shape, but don’t just trace tight to the edges—add a bit of space around the gun. This buffer ensures that when you later mold and trim the holster, there’s enough material to accommodate features like tall sights, belt clips, and smooth draw angles. It’s better to overestimate the size now than to run short later.
Glock 43X owners can also compare ready-made choices in our Glock 43X concealed carry holster guide.
Once your outline is complete, grab a utility knife and score firmly along the lines—make several passes to create a deep score. After scoring, bend the Kydex back and forth until it snaps cleanly along the line. Your goal here is a clean, oversized piece that allows for trimming, spacer gaps, and screw placements in later steps. Precision isn’t critical yet—this rough cut sets the foundation for molding.
Step 2: Heat and Mold the Kydex
To shape the Kydex, it must be evenly heated until it becomes soft and pliable. A toaster oven or heat gun works best—avoid using your kitchen oven. Heat the sheet to approximately 250°F for about 2 minutes, or until the edges begin to curl slightly. If it starts cooling before molding, you can safely reheat it.
Once the Kydex is soft, place it immediately over your firearm, which should be set on a spacer. Cover it with foam and apply firm pressure using scrap wood and your body weight or clamps. This ensures the Kydex molds tightly around the firearm. Align the sight channel carefully and wear heat-resistant gloves to protect your hands during this step.
Step 3: Trim and Refine the Holster Shape
Once the molded Kydex has fully cooled and hardened, use a pencil to mark the final outline of your holster. Pay close attention to areas around the trigger guard and dustcover for proper fit. Then, carefully trim along the outline using a utility knife or Dremel tool. Aim for clean corners and a uniform shape—this will affect both comfort and appearance.
See how leading 1911 holsters handle that oversized trigger guard for a clean draw.
To prevent rough or sharp edges, sand all around the holster starting with 150-grit sandpaper and gradually move up to 600 grit. Wet sanding during the finer grits can improve smoothness and reduce friction against clothing or skin. The end result should be a polished, professional edge.
Step 4: Drill and Assemble
Once your holster is shaped and trimmed, the next step is to prepare it for hardware installation. Begin by carefully marking where the eyelet holes (also known as rivet or screw holes) will go. These marks should be evenly spaced and positioned to provide balanced tension and secure retention of your firearm.
Ensure there’s enough gap between the Kydex layers—this allows for some adjustability in how tightly the holster grips the firearm. Use a drill to make clean, round holes. Drilling too fast or without proper support can crack the plastic or misalign the holes, so take your time and support the material properly underneath.
With your holes drilled, it’s time to add the eyelets (if you’re using them) or Chicago screws. Eyelets are typically used for permanent fastening, while Chicago screws allow you to adjust or disassemble the holster later.
To install eyelets:
- Insert them through the holes and use a press tool (or hand tool) to crimp them in place.
- Ensure the flare is even and tight.
To fine-tune the spacing or retention:
- Use rubber spacers, such as small sections of fuel hose, between the layers. This helps maintain pressure without damaging the Kydex and adds a slight spring effect for better retention and draw.
Now, fasten the belt clip to the holster. This is where the holster connects to your body or belt system. For appendix carry fans, these best IWB appendix holsters show the clip angles that work.
To ensure a comfortable fit, slightly recess the screw heads into the holster’s surface if possible, or use washers to prevent the screws from sticking out or causing discomfort.
Line up the clip’s holes with your drilled mounting holes.
Secure it using Chicago screws, which are commonly used for holsters because they’re strong and removable.
Compact .40 shooters should check the best Glock 23 holster picks for different ride-height options.
Step 5: Test Fit and Function
After assembling the holster, it’s crucial to test how well it holds and releases your firearm. Slide your pistol into the holster and listen for a positive “click”—this sound confirms that the trigger guard or frame has locked securely into place.
Now, draw the pistol and check how smoothly it comes out. If the holster grips too tightly or feels like the gun is stuck, or if it’s too loose and lacks resistance, that means the retention needs adjusting.
The good news? Kydex is thermoformable—you can reheat just the trigger guard or retention area with a heat gun, then lightly press it to reshape. Even a small adjustment can drastically improve retention and comfort.
Now that the basic form and function are working, it’s time for fine-tuning:
- Trim any sharp edges using a utility knife or Dremel to avoid discomfort during wear.
- Sand the edges again if needed, especially around areas that will make contact with your body.
- Adjust the draw angle by repositioning the belt clip, if it’s adjustable.
- Check screw tension—make sure everything is tight but not over-tightened.
- Test wearing it around your waist or carry position to ensure it’s comfortable for daily use.
If a rigid holster feels bulky on a jog, a belly band holster can be a flexible alternative.
Conclusion
Making your own Kydex holster is not only cost-effective but also deeply rewarding. With just a few tools and materials, you can create a custom-fit, professional-looking holster tailored to your exact firearm and comfort needs. Each step—from heating and molding to trimming, drilling, and testing—offers a hands-on experience that enhances both your skills and understanding of gear setup. Whether you’re a DIY enthusiast or someone looking for a personalized carry solution, this guide proves that building a durable, functional Kydex holster is absolutely within reach. Just take your time, follow each step carefully, and enjoy the process.
And if rimfire isn’t your only passion, our picks for the best pellet guns for hunting might interest you.